The Jedyly Protocol
Jedyly provides a backend infrastructure for a headless commerce. We solve the "DevOps" problem. We handle the server provisioning, SSL, scaling, and maintenance so you can focus on doing business. We give you the quickest way to have an admin dashboard for your e-commerce apps and a managed backend that powers your online shop.
Powered by Medusa
Our platform deploys a highly optimized instance of MedusaJS v2. While we manage the infrastructure, the core commerce logic is powered by the open-source Medusa framework.
01. Database
Jedyly follows a Bring Your Own Database (BYOD) architecture. You retain full ownership of your customer data. Below are step-by-step guides for the most popular PostgreSQL providers.
Neon.tech (Serverless)
Recommended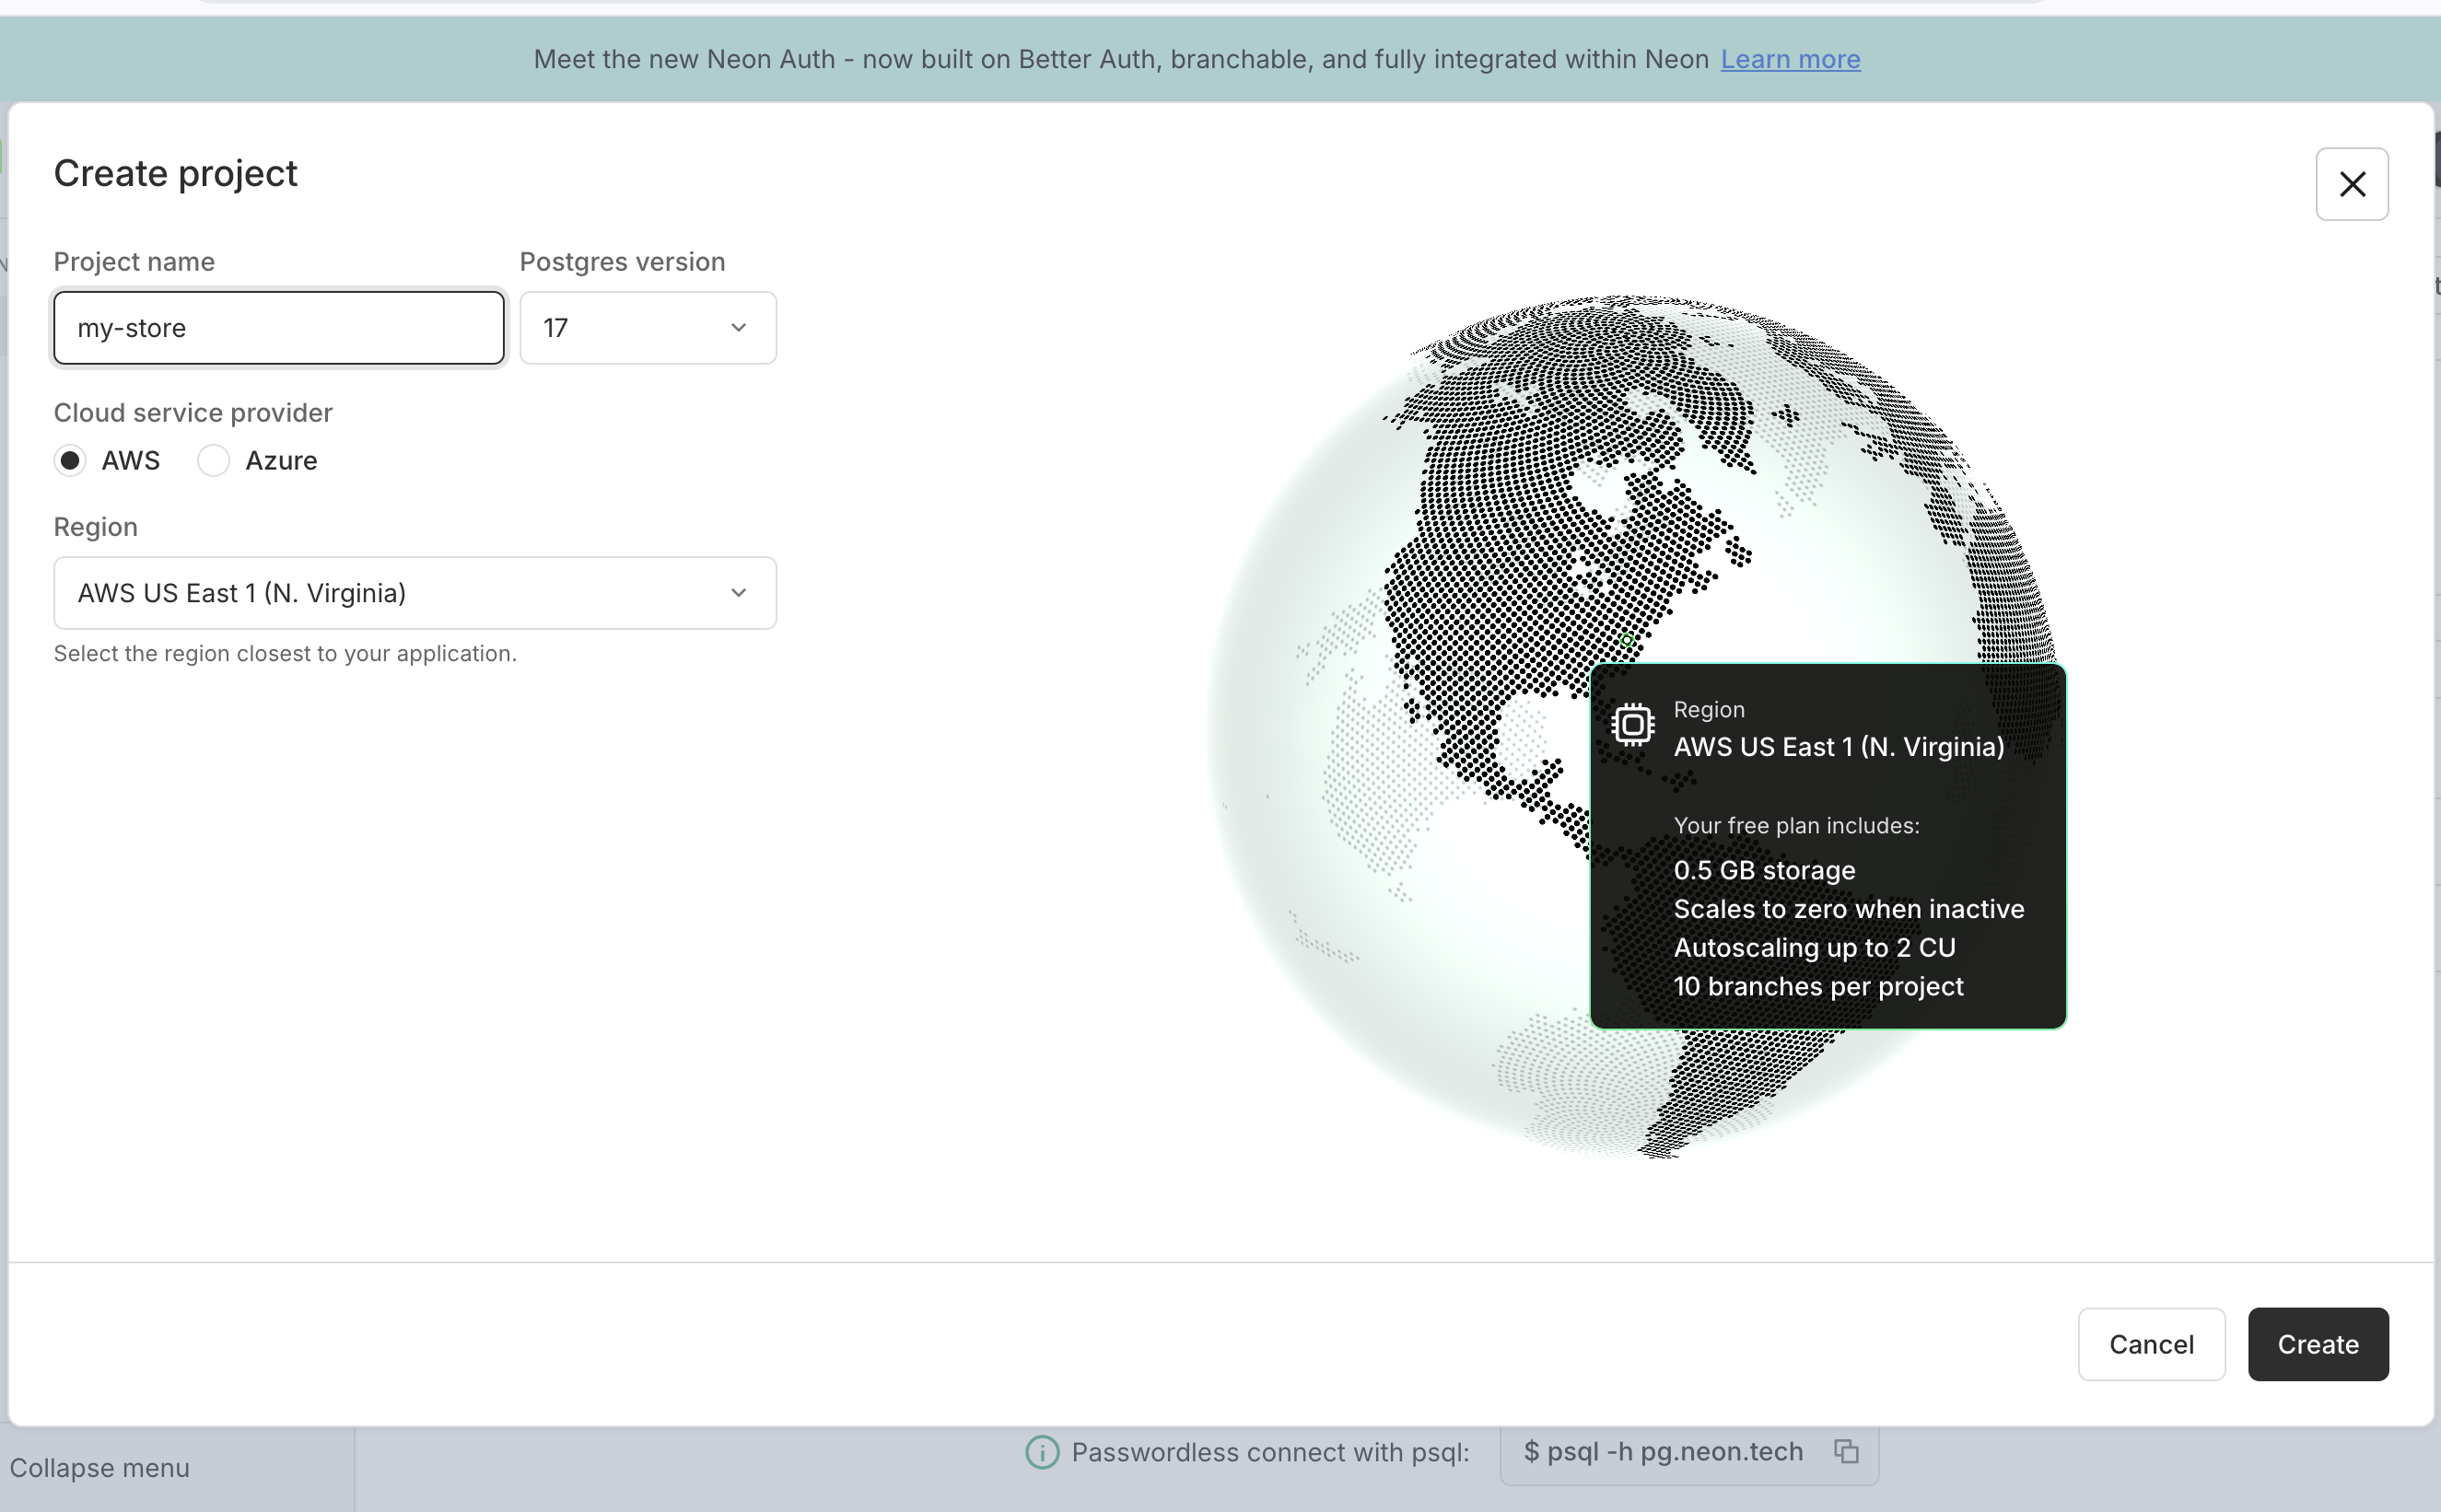
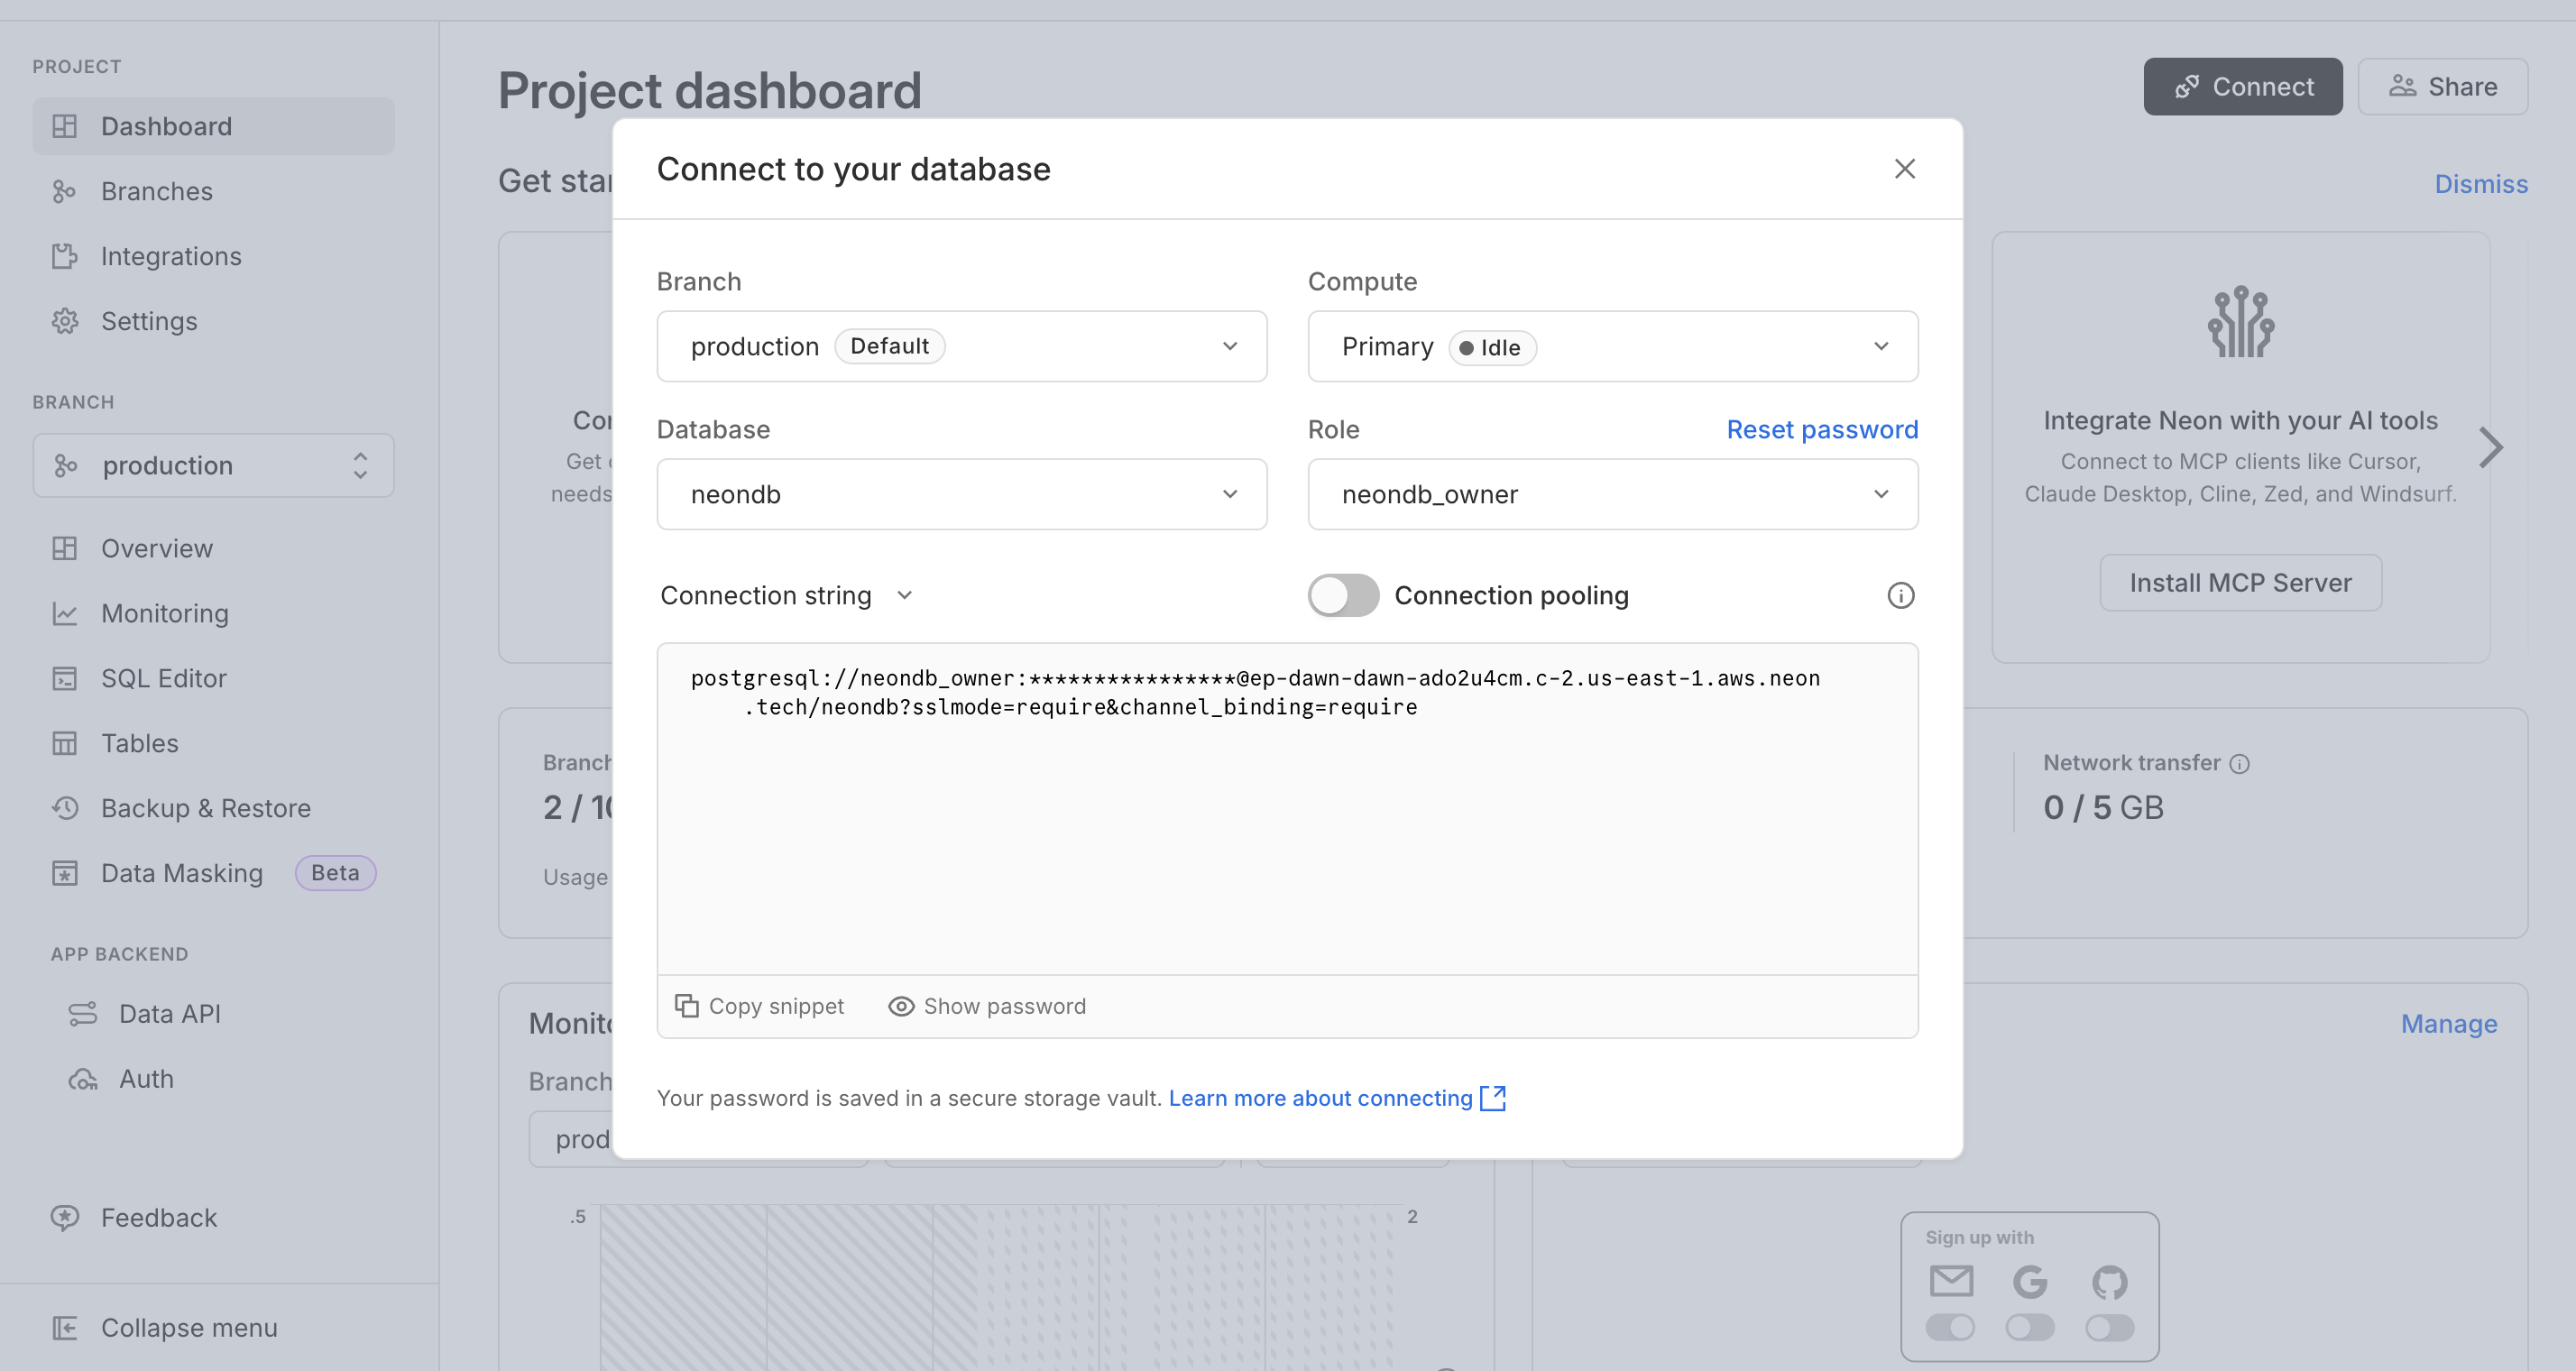
Locate Connection String
On your Dashboard, look for the "Connect" button. Ensure Pooled connection is unchecked if available (Medusa works best with direct connections in this setup). Click on Copy snippet to copy the connection string to the clipboard.
02. Redis Cache
Medusa requires a Redis instance to handle the Event Bus and Caching. We recommend using the official Redis Cloud.
Redis Cloud (redis.io)
Recommended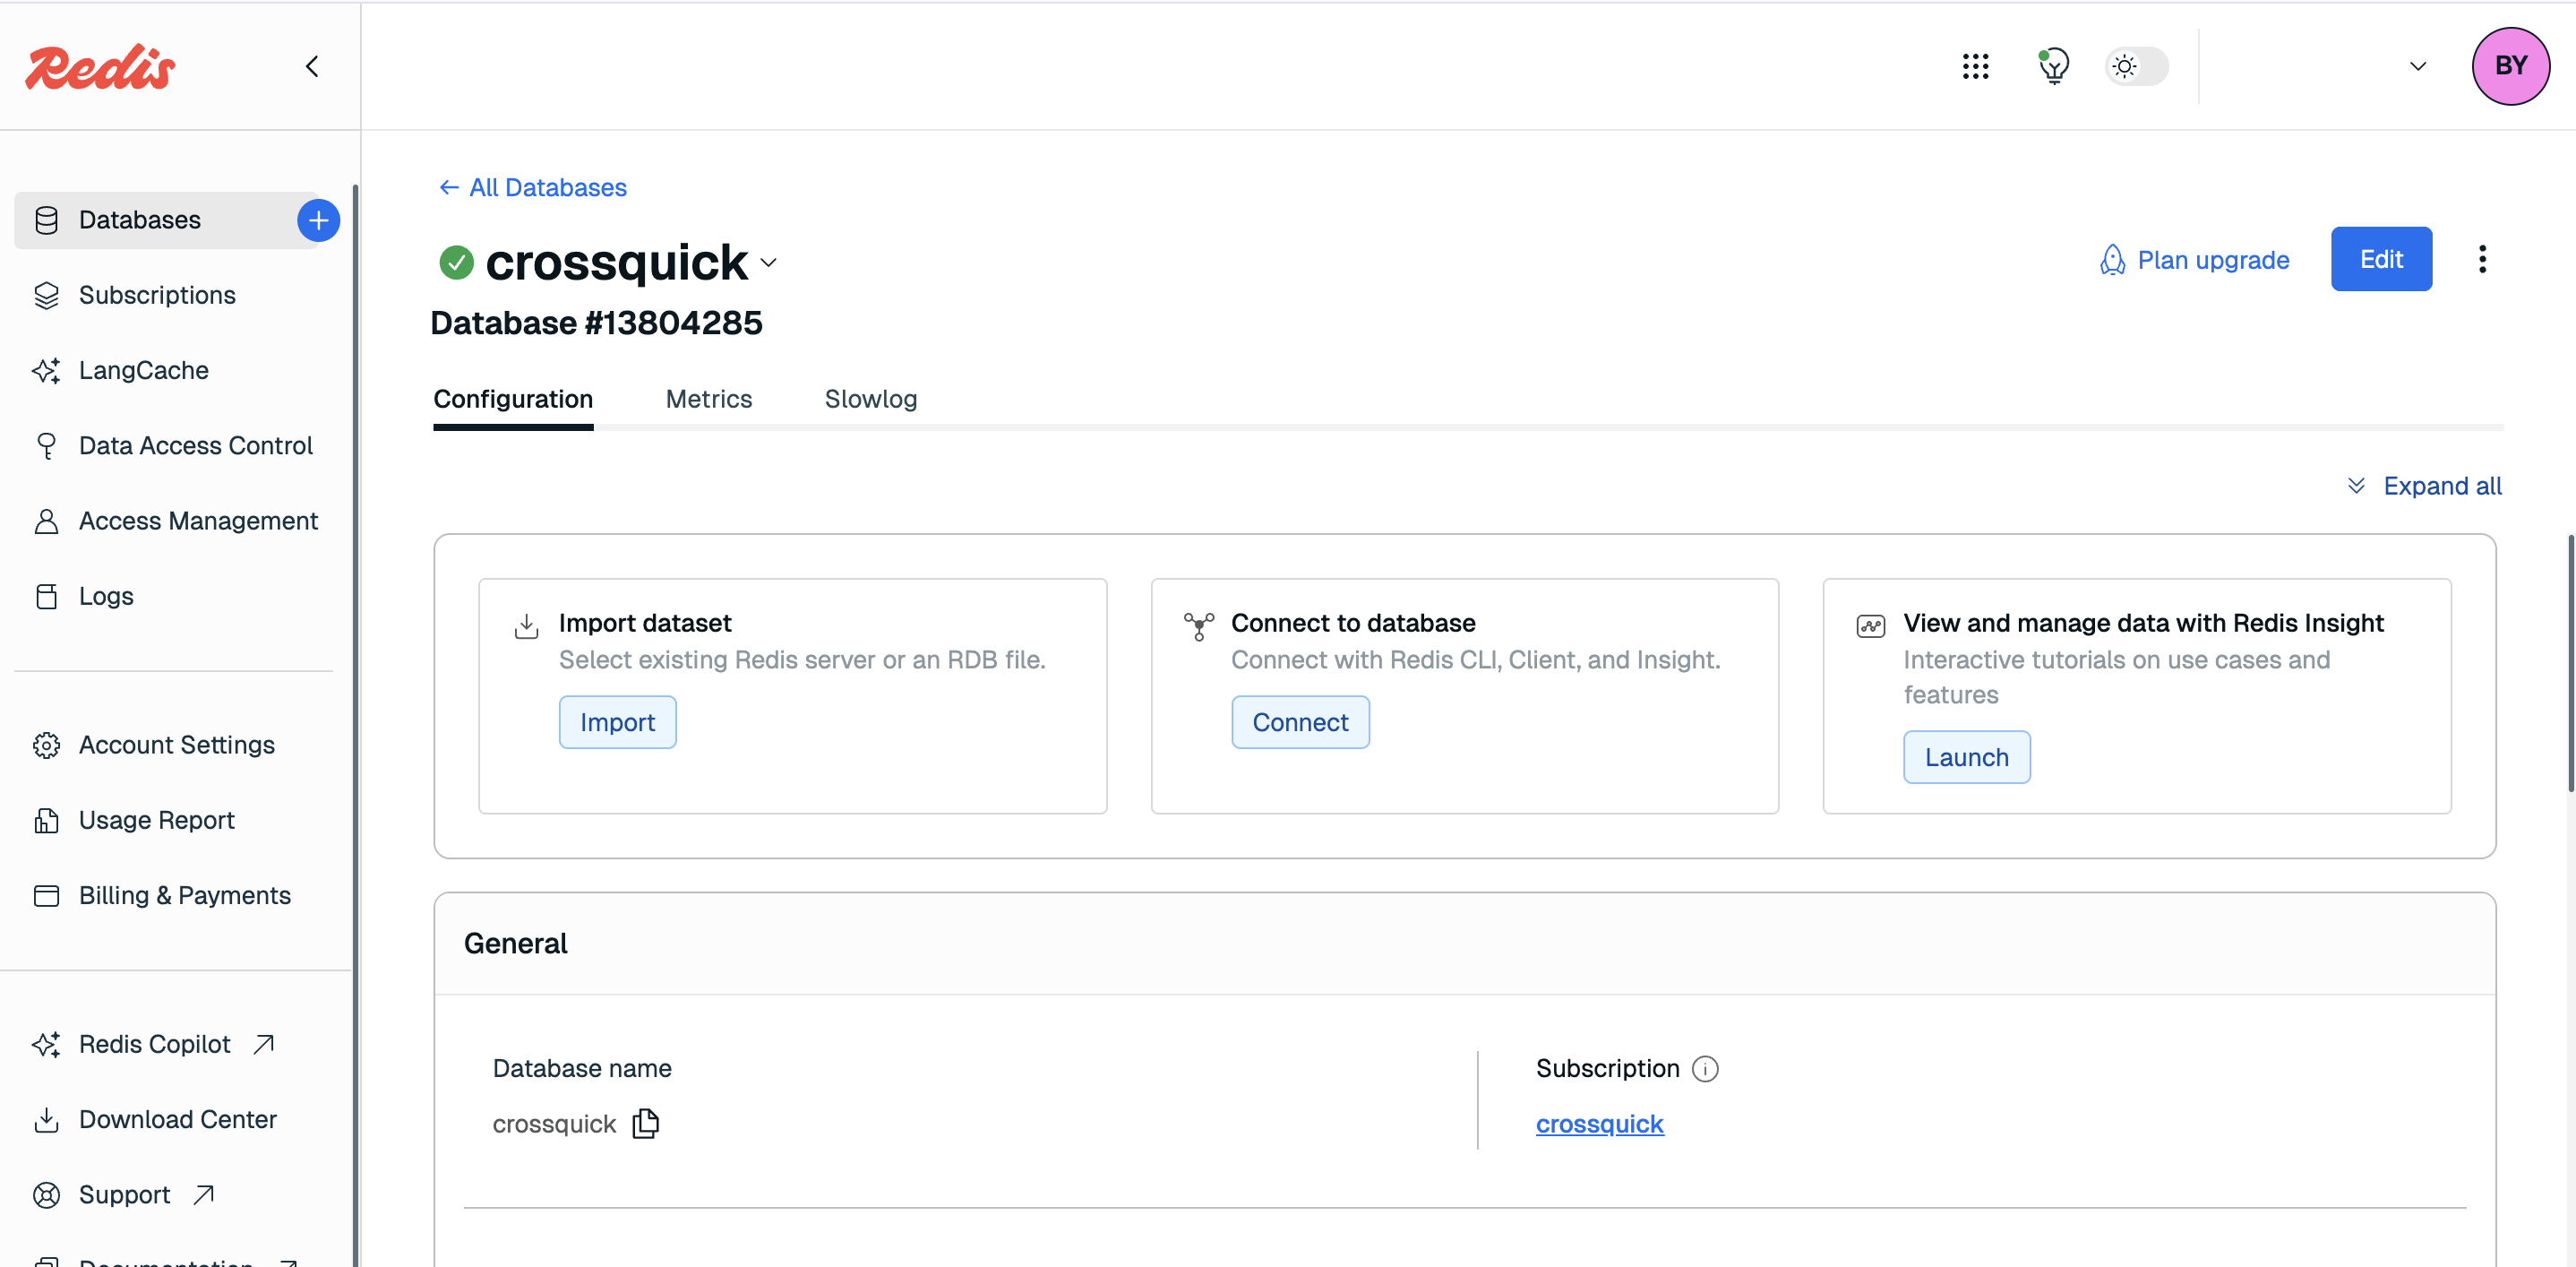
Get Connection Details
Once created, click to open and scroll to the Configuration tab. Click on "Connect" to open a side panel on the right. Click to open the Redis CLI and copy everything starting from the "redis://default@..."
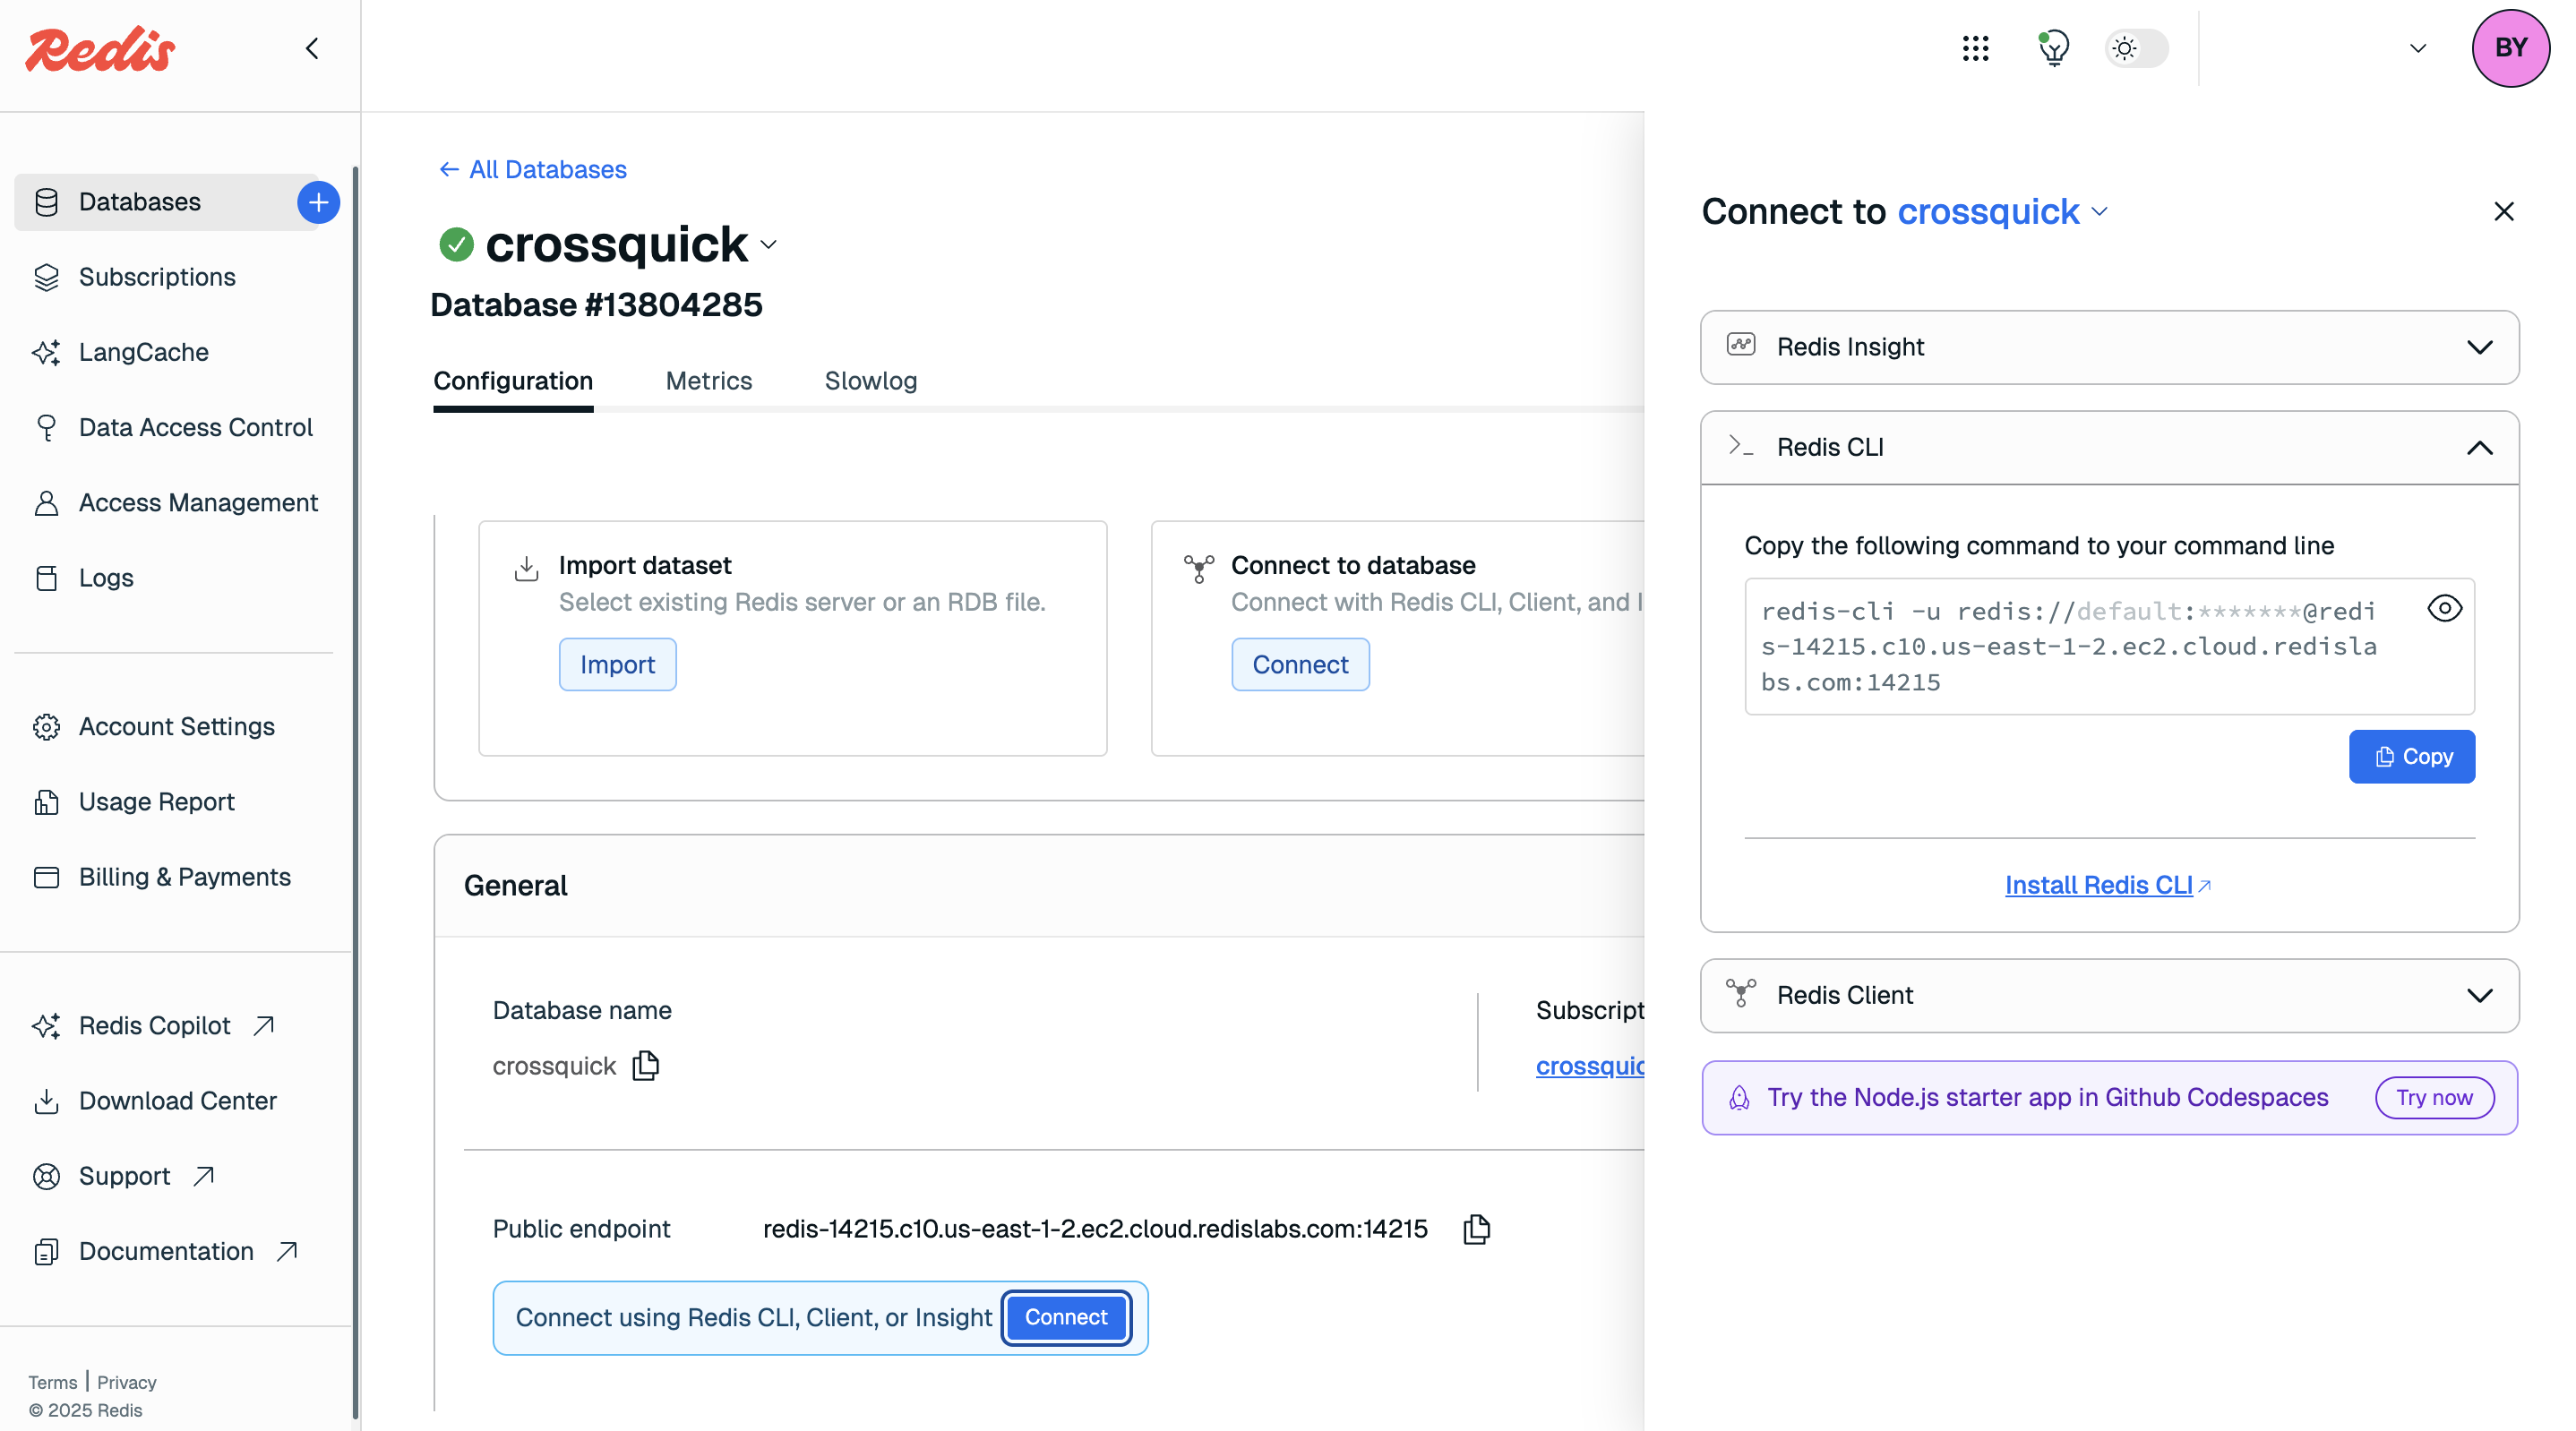
Redis URL Format
redis://default:[PASSWORD]@[HOST]:[PORT]
redis://default:YourSecretPass@redis-12345.c1.us-east-1-2.ec2.cloud.redislabs.com:12345
03. File Storage
Product images and digital assets are stored in an external object storage bucket. We use the S3-Compatible standard. We highly recommend Cloudflare R2 for its zero egress fees.
Cloudflare R2
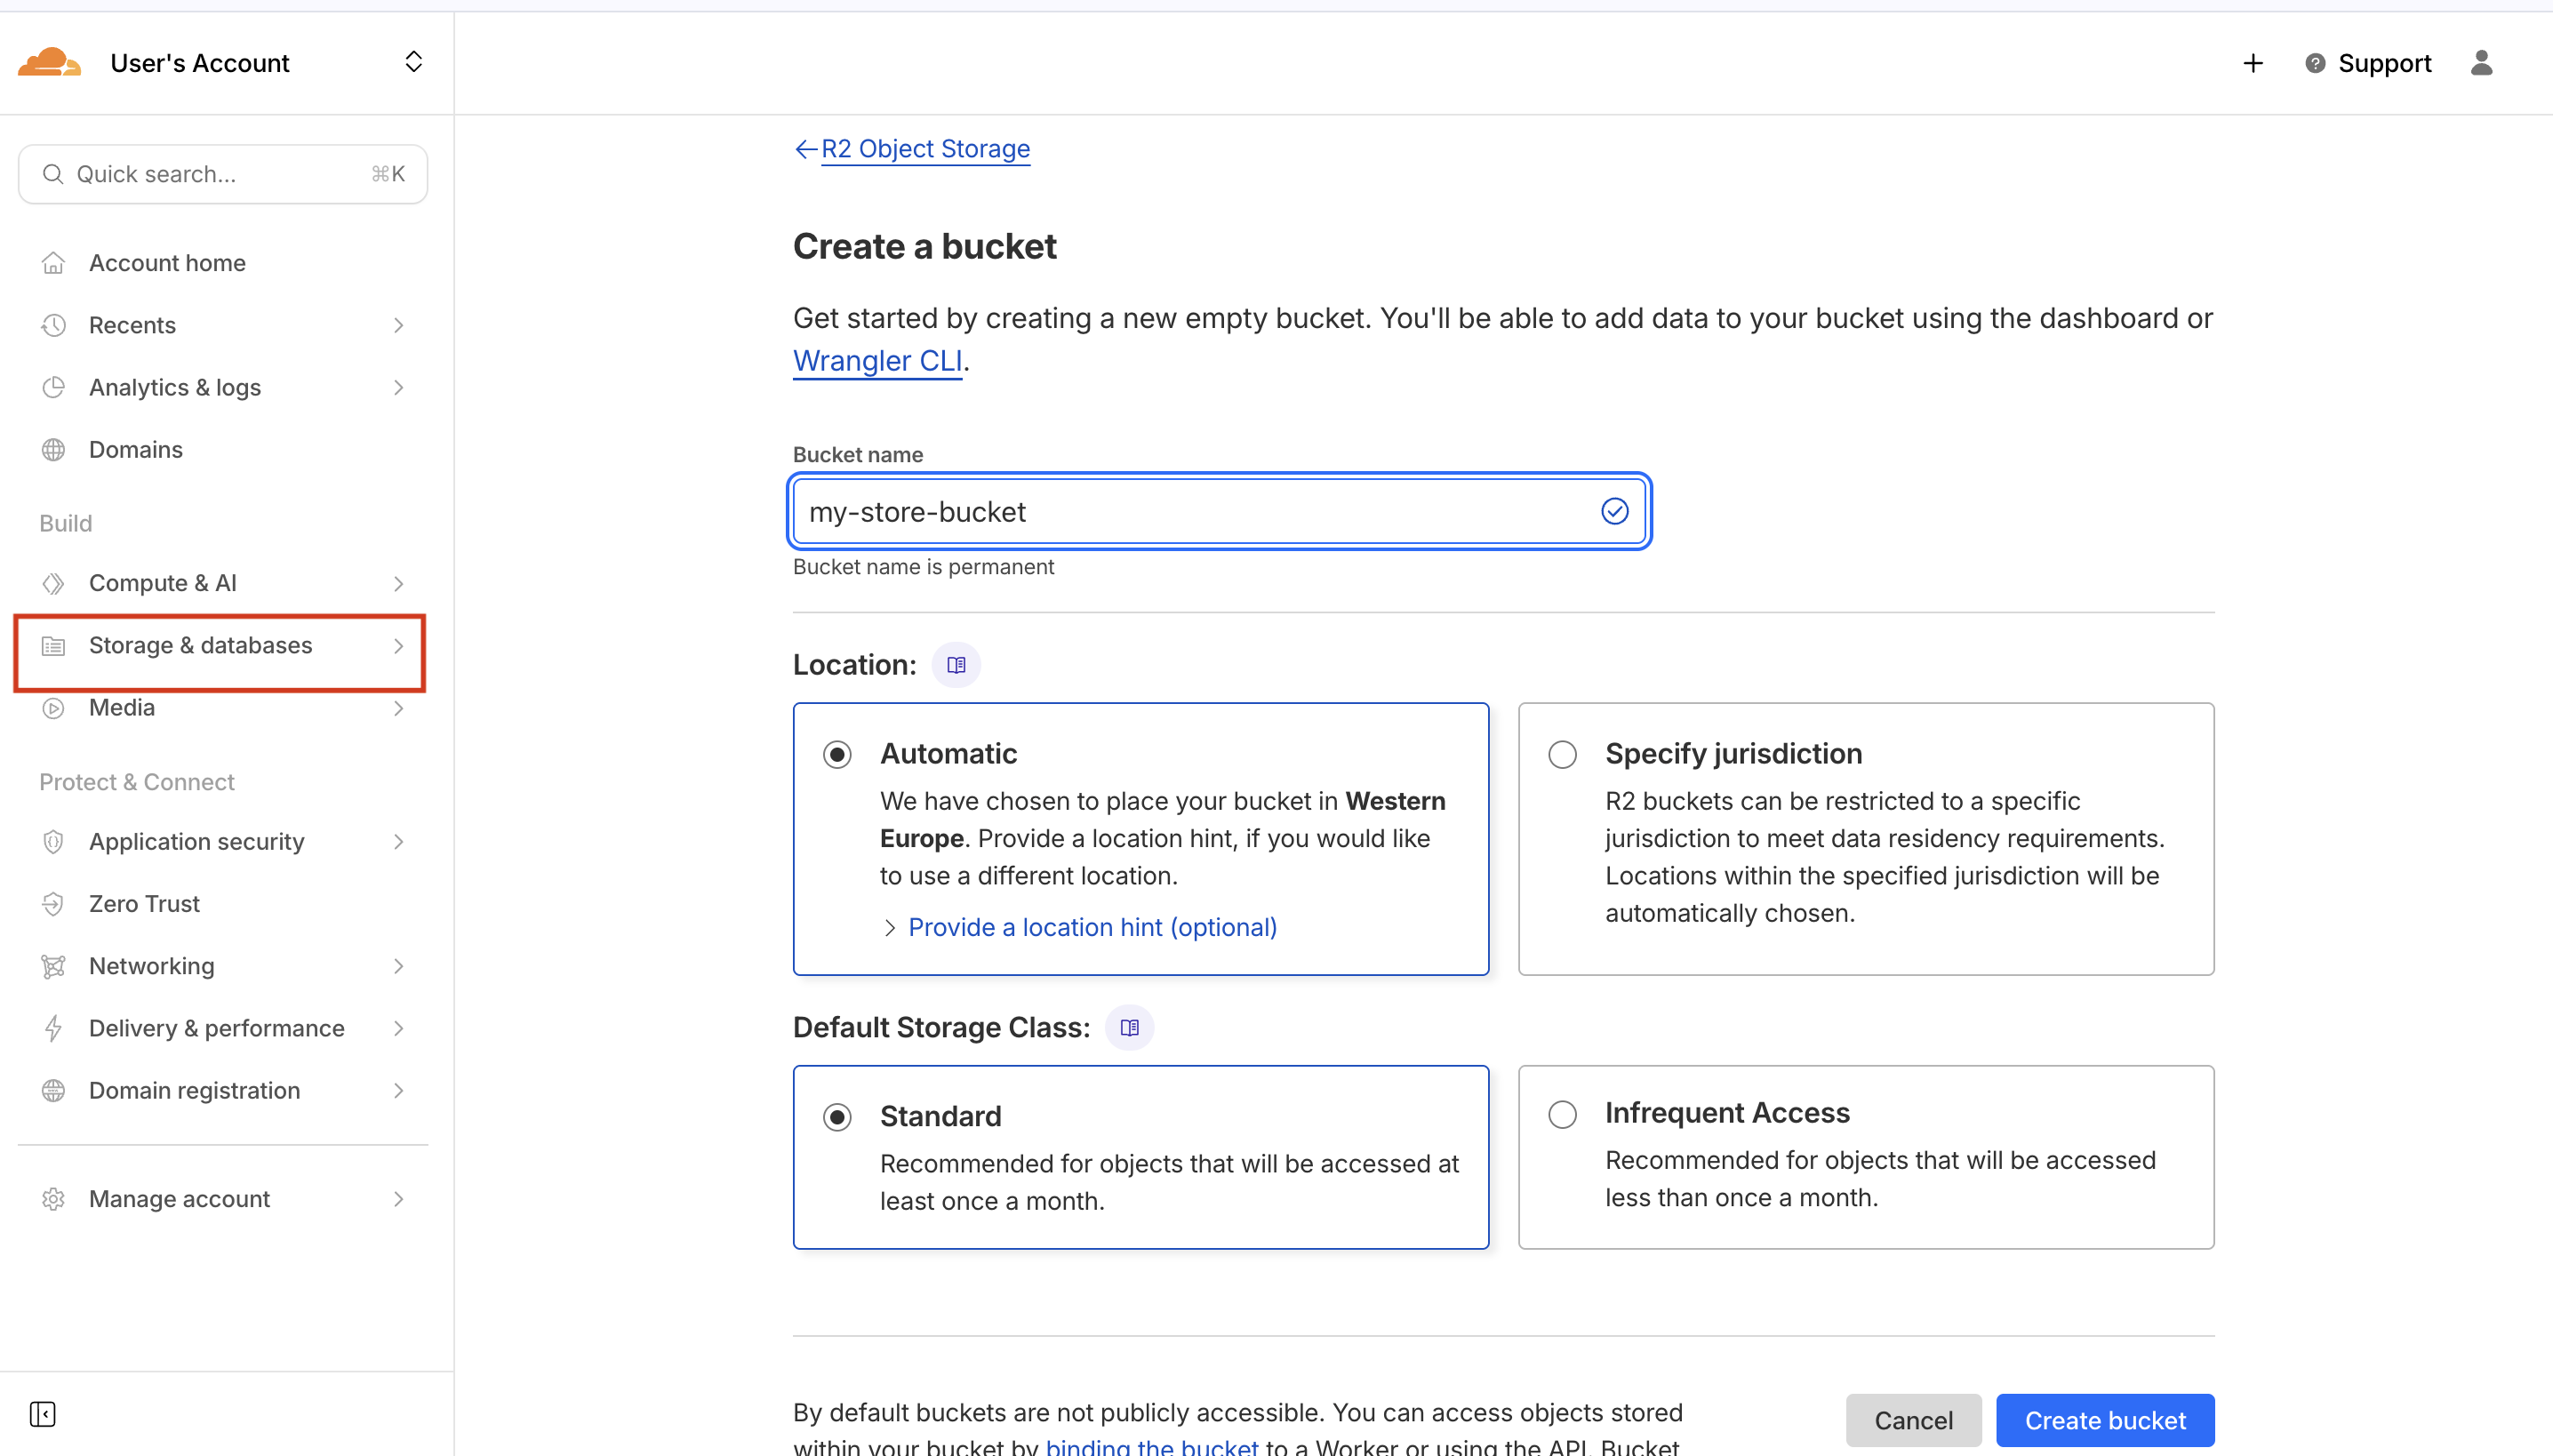
S3 CompatibleCreate Bucket
Log in to the Cloudflare Dashboard and navigate to R2 in the sidebar. Click Create Bucket and give it a unique name (e.g., "my-brand-assets").
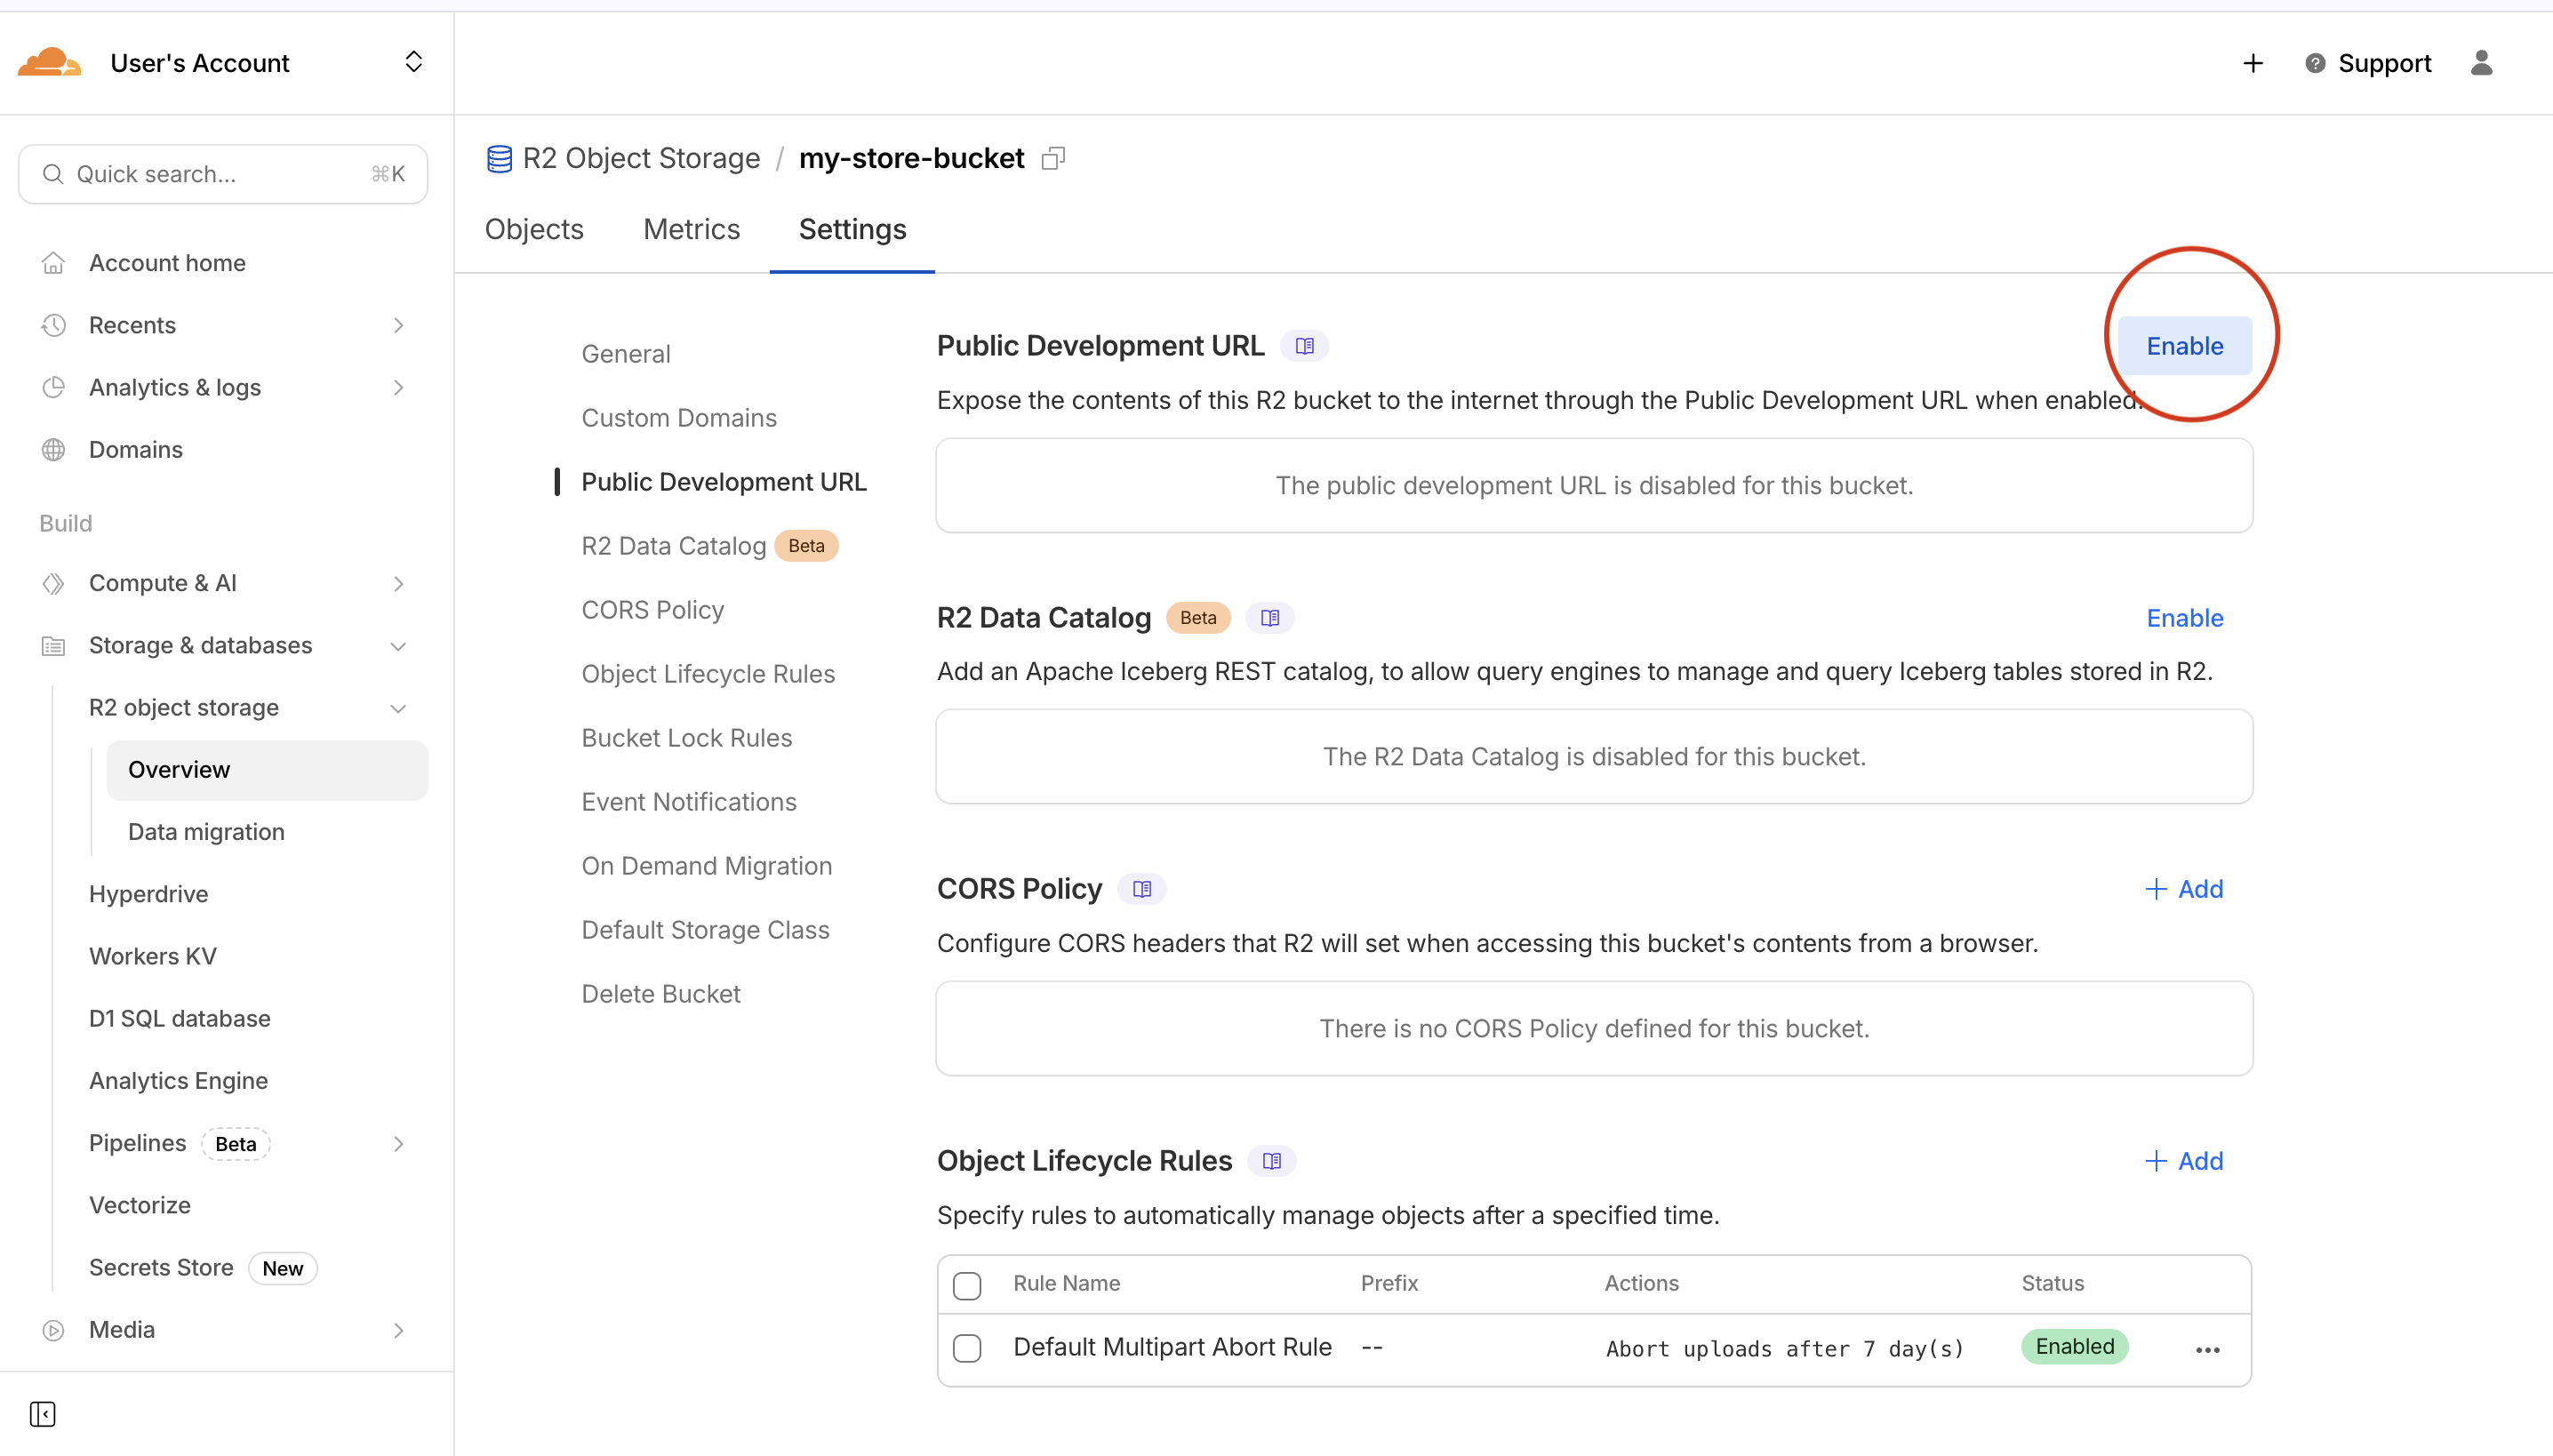
Enable Public Access (Critical)
This step ensures your product images can be accessed publicly in your applications.
Click on your new bucket, then go to the Settings tab. Scroll down to Public Development URL.
Click on the "Enable" button to generate the S3_FILE_URL required to deploy on Jedyly.
The URL that appears (e.g., https://pub-xuyt44643234rfff6yz.r2.dev) is your S3_FILE_URL when deploying on Jedyly.
If you wish to serve your product images with a custom domain, check cloudflare documentations on how to add custom domain to you R2 buckets.
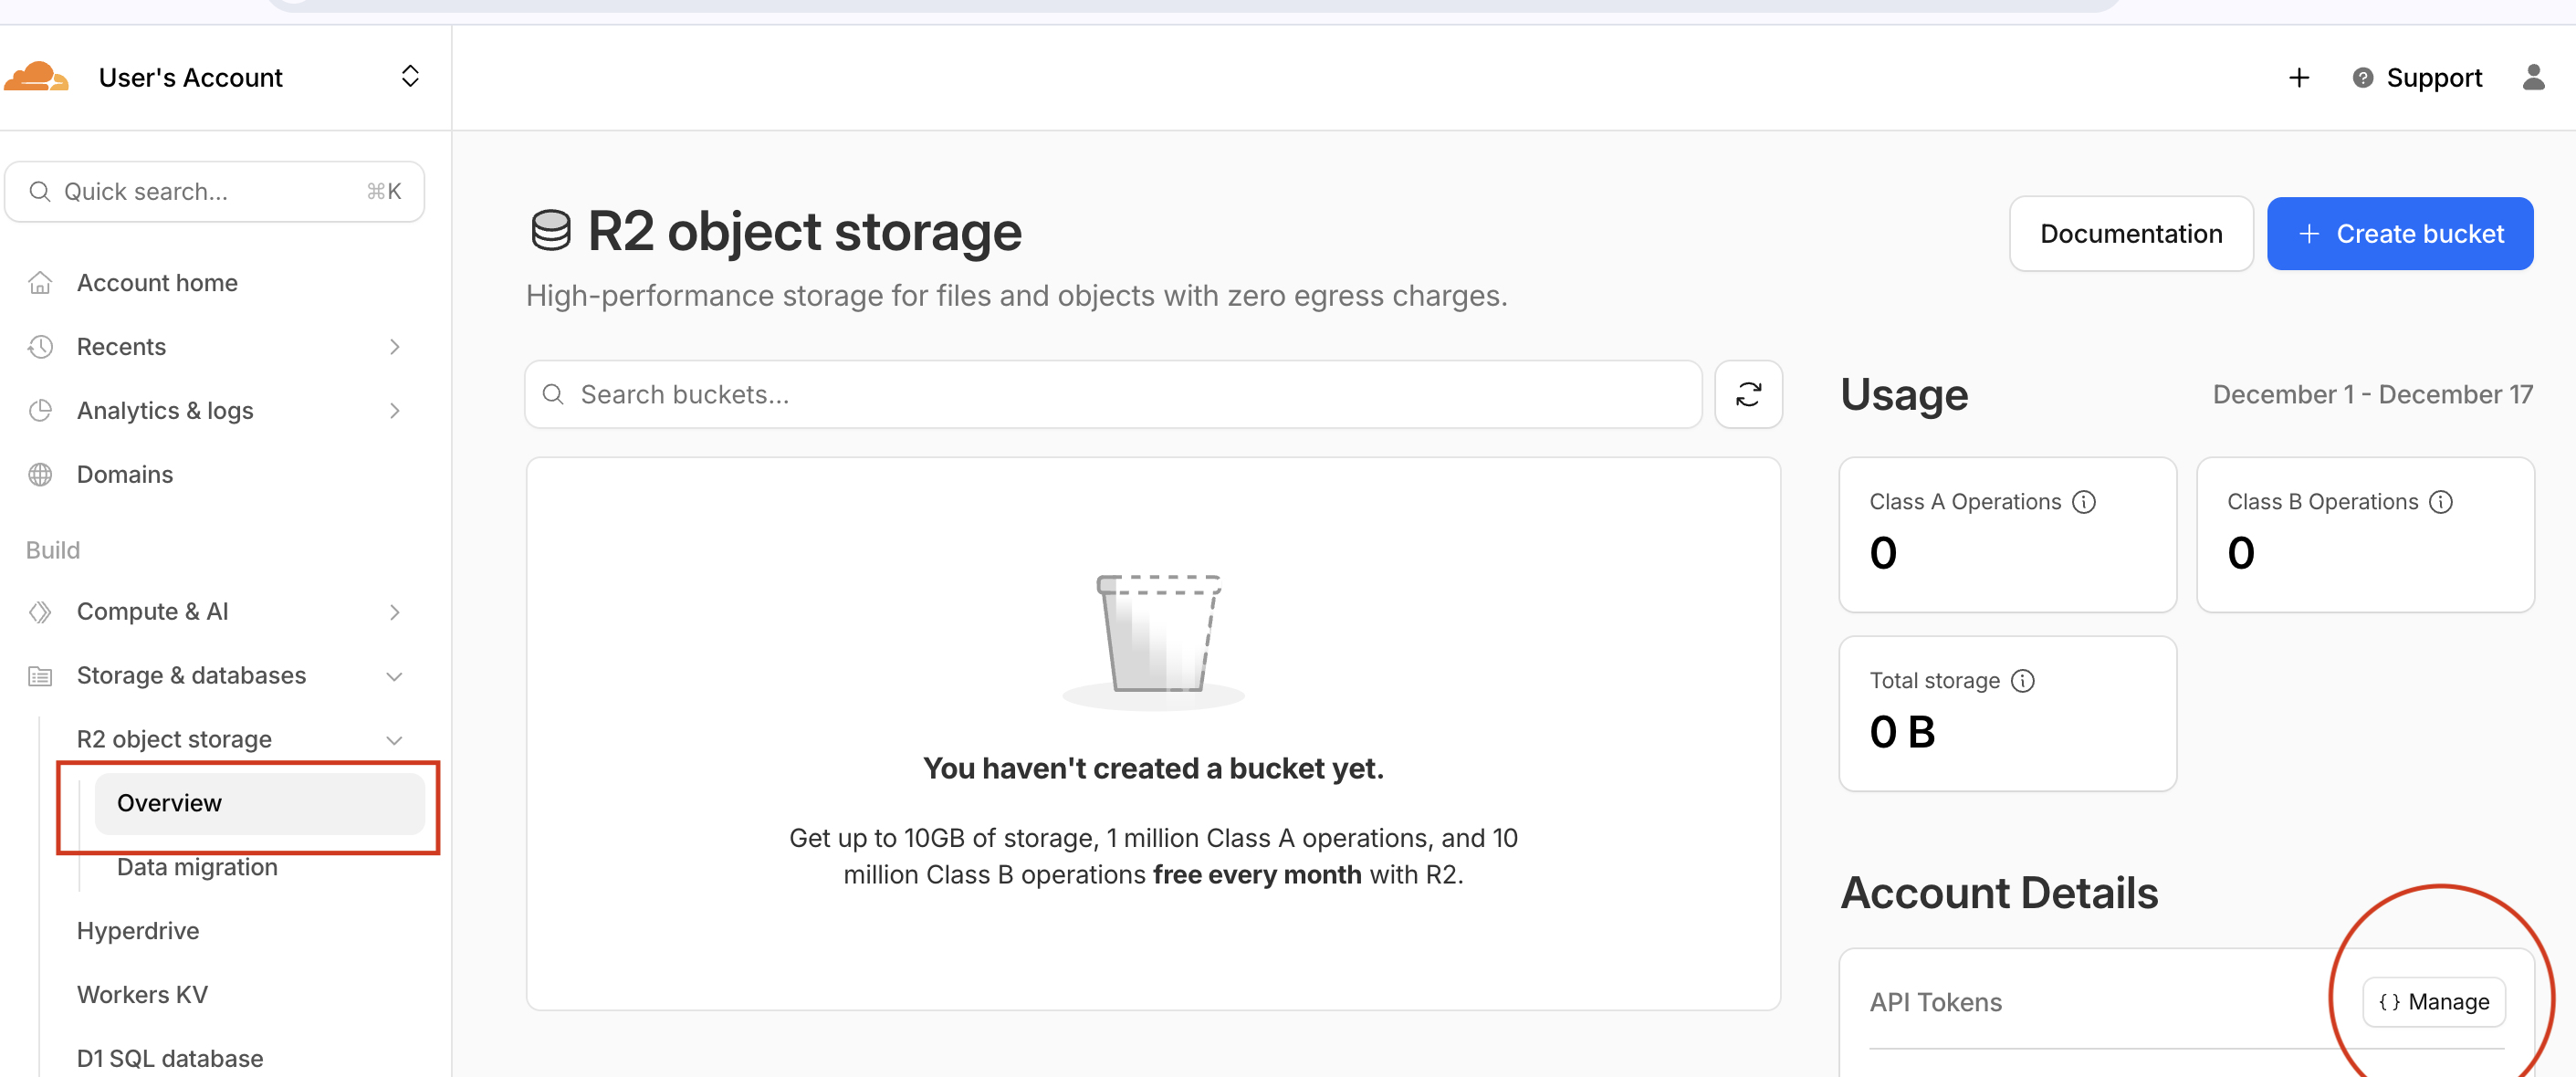
Generate API Credentials
Go back to the main R2 page.
Click "Manage API Tokens" (bottom right). Create a new token with Admin Read & Write permissions. Wait for it to succesfully create and copy the following keys:
- 1. S3_ACCESS_KEY_ID
- 2. S3_SECRET_ACCESS_KEY
- 3. S3_ENDPOINT
Configuration Mapping
Use the generated credentials to fill the Jedyly configuration form.
Note that if you are using cloudflare R2, the region is automatically determined. Always use "auto" when you have to provide the region of your bucket.
04. Payments
Stripe
Accept global card payments with stripe.
Paystack
Accept global card payments with paystack.
05. Deployment
- Navigate to Deployments.
- Enter your Store Domain (e.g., store.mybrand.com).
- Paste your Connection Strings.
- Click Launch.
06. Frontend
Connect your Angular, Next.js, React or Vue frontend to the API using the MedusaJS SDK. Your backend exposes a standard REST API compatible with the MedusaJS v2 SDK. Use this to build custom storefronts.
JS SDK Examples
v2.0Initialization
Access your admin dasboard that we created in previous steps. Locate Settings > "Publishable API Key" on the left panel and create a new key. Learn more at creating publishable API Key.
Also, copy the link to your backend server from Jedyly. It is same as the link to your admin dasboard without the "/app" and create a new Medusa client to interact with your backend.
npm install @medusajs/js-sdk@latest @medusajs/types@latest
import Medusa from '@medusajs/js-sdk';

export const client = new Medusa({
    // The link to your managed backend server
    baseUrl: 'https://your-store-name.jedyly.com',
    debug: false,
    // Get this from your Admin Dashboard
    publishableKey: 'pk_...'
});
Fetching Products
Retrieve a list of products. Learn more at showing products in a storefront.
 // List products with prices
  const { products } = await client.store.product.list({
    limit: 20,
  });

  // Get a single product by handle
  const { products: [product] } = await client.store.product.list({
    handle: 'my-t-shirt',
  });
Collections & Categories
Use these to organize your catalog navigation. Learn more at showing product collections in a storefront and showing product categories in a storefront.
 // Fetch Categories (Hierarchical)
  const { product_categories } = await client.store.category.list({
    level: 0,
    include_descendants_tree: true
  });

  // Fetch Collections (Flat)
  const { collections } = await client.store.collection.list({
    limit: 10
  });
Cart Operations
Managing the shopping cart state and initiating payment sessions at checkout. Learn more at managing products cart in a storefront.
 // 1. Create a Cart
  const { cart } = await client.store.cart.create({
    region_id: 'reg_123' // Optional, defaults to store default
  });

  // 2. Add Item
  await client.store.cart.createLineItem(cart.id, {
    variant_id: 'variant_123',
    quantity: 1
  });

  // 3. Start Checkout (Payment Session)
  // Payment collection needs to be enabled in your admin dashboard
  await client.store.payment.initiatePaymentSession(cart, {
      // Jedyly supports "pp_paystack_paystack" or "pp_stripe_stripe"
      provider_id: 'pp_paystack_paystack'
  });
Customer Authentication
Handling login and registration of your customers. Learn more at managing your customers in a storefront.
 // Login
  const { token } = await client.auth.login('customer', 'emailpass', {
    email: '[email protected]',
    password: 'secret_password'
  });

  // Logout
  await client.medusa.client.auth.logout();

  // Register (Get Token -> Create Customer)
  await client.auth.register('customer', 'emailpass', {
    email: '[email protected]',
    password: 'secret_password'
  });

  await client.store.customer.create({
    first_name: 'John',
    last_name: 'Doe',
    email: '[email protected]'
  });